Showing posts with label nature. Show all posts

Thursday, July 14, 2011

Pick Your Own

Camp Brighton is still in full swing although we have temporarily relocated up north for a visit with the all-important grandparents. Unfortunately, my camera and a good internet connection were left behind in Charlotte. Alas, we are making do...

One of our summer traditions has always been blueberry picking. We are lucky enough to have a wonderful farm just a few minutes away from my parents' house. However, no matter what state we have lived in - Ohio, Massachusetts, and now, North Carolina, I have enjoyed searching out "pick-your-own" opportunities because they are so much fun and also a great way to support local farms and businesses.

It isn't too difficult to find out if there are any local fruits or veggies just waiting to be picked by you and your family. Most state agriculture boards offer a list of pick your own farms. There is also a great website - aptly named pickyourown.org - that allows you to search by state to find farms near you. In North Carolina, we are lucky to have a vibrant community that strives to support local agriculture and a local author, Diane Daniel, recently released a new book - Farm Fresh North Carolina - an excellent guidebook to exploring food and farms all over the state.

Off to a good start!
Enjoying the view from my back ...


Blueberry picking is an activity that can be enjoyed by children of all ages. Because the blueberry bushes are generally small - most of the bushes at the farm we were picking at were all shorter than an average adult - the berries are very low to the ground and can be easily picked by your littlest walker. Buckets were provided upon our arrival and we were directed to a small grove of bushes just bursting with blueberries.

Our tired crew is ready to go home!
The children were issued 2 simple instructions, "Only pick the blue ones and don't pick up the ones on the ground." The children scattered, eager to get picking. My friend and I were left alone to leisurely chit chat and pick our own buckets of berries.  This activity is such a great way to get your kids outside, enjoying the fresh air, and really connecting their food to the actual source. Blueberries already enclosed in a plastic clamshell will never look the same again!

When you look for a local farm, you will want to be aware of hours and picking conditions. We arrived at the farm rather early - we wanted to make sure the farm didn't get "picked out" and we also didn't want the kids to get overheated as the day wore on. Our farm had picking hours from 7 to 12 so be sure to call ahead to confirm that the farm is open and ready for your gang.

Of course, one of the best parts of a pick-your-own farm experience is the built-in snack factor but another great aspect is the ability to bring home your loot and continue to eat it and cook with it. The very next day we made a blueberry quick bread and a blueberry streusel cake. Delicious!! If you find that you have picked too many blueberries, you can always freeze them. Don't wash them first. I like to measure out 2 cups of blueberries at a time and place them in freezer bags. Other techniques suggest laying them out on a cookie sheet and freezing them before putting them into freezer bags and storing in the freezer. Blueberries keep very well in the freezer - we have easily kept them past six months in a cold part of the freezer with no issues. Find yourself a farm and get picking!


Additional Resources:

Tuesday, July 5, 2011

Flower Prints

The basics ...
My girls and I went to the Davidson Farmers Market a few weeks ago and they were doing a great craft - flower prints. If you have kids with short-attention spans or children who like to bang things, this is the project for you.

You will need:

Assorted colorful flowers
Paper (paper with a little texture works well)
Wax paper
Rubber mallet

How-to: 

"I found blue!"
This activity started with a flower hunt - my kids were told to find one flower per color so as not to decimate my mother's lovely gardens. The mission was successful; as they ran around the yard, I could hear them calling out, "I found yellow!" and "Does anyone have blue?" For the most part, they all stuck to the "one flower per color" rule.

After collecting the flowers, the real fun began ... the banging. Using somewhat rough paper, the kids arranged the flowers (or just the petals) face down on the paper placed on a hard surface. (We used scraps of wooden boards.) I tore off a piece of wax paper roughly the size of the paper and placed it over the flower - one flower at a time works best and then they can rearrange the flowers or petals as they wish. Using a rubber mallet, the kids banged away on their little flower, trying to transfer some color and even a little bit of the petal imprint, to the paper.

Watch your fingers!
Helpful hints ... After much experimenting, we discovered that "little bangs" were better at transferring color from the petal to the paper. "Big bangs" with the rubber mallet were not very successful. We also tried to eliminate the wax paper and just hit the flower but, for the most part, that technique did not work well at all. The girls also tried to get the flowers a little bit wet before they banged them, a little too much water quickly made the paper a soggy mess so we opted not to dampen the flowers at all - being that they were freshly picked, they were a little damp to begin with.  Also, although a rubber mallet is not too heavy, it is probably a good idea to remind your little people not to put their fingers in the way!

Try different flowers, different colors, different papers. Let the children "experiment" to see what works the best! Have fun!

Friday, July 1, 2011

Eggshell Seedlings

Our empty eggshells
Adding the soil ... with a kitchen spoon

If you compost, you know that eggshells are great additions to your compost pile! Some gardeners even directly crush eggshells into their garden beds, partly for nutrients and partly to deter certain critters from eating their plants. Starting seedlings in eggshells is the perfect way to combine a crafty project (painting eggshells) with a practical project (starting seeds for your garden).

Here in North Carolina, we are lucky to be able to plant almost all year round so it can always be a fine time to start seedlings. And, even if it isn't a great time to start veggie seedlings, you can always plant flowers!

Painting! Of course ...
You will need: 

Empty eggshells - rinsed out and dried
Non-toxic paint (if you want to... we paint everything)
Dirt
Seeds

Directions:

1. Prepare the eggshells ... We get free-range Amish eggs by the flat every week or so - we eat a lot of eggs around here - so it doesn't take long at all to accumulate a small bunch of empty eggshells waiting to be planted. I rinse out the eggs with hot water and let them air dry overnight. On the second day, I let the kids paint them - inside and out.

Let the seeds germinate
2. Prepare the seeds ... For this project, I used some okra seeds that my friend had generously given me from her mother-in-law's garden. Just to extend the project a little, we placed the seeds into a small glass and covered them with water so we could watch them germinate overnight. The kids loved seeing them sprout in just a little bit of water. You don't really need to do this step but it is fun to watch!

3. After the eggs are dried, we filled them with soil using a spoon. Yes, a spoon right from the silverware drawer. We're not picky over here. Place your seeds into the soil-filled egg. A good rule of thumb is that you should plant the seed twice as deep as it is wide.

4. Once you have planted your seeds, you have two options depending on the time of year. If the weather is not quite ready for starting seeds outdoors, this is the perfect way to create your own little starter plants. Keep your eggshell seedlings in a sunny window and keep the soil damp. After the seedlings have started to grow, you can transfer them directly to your garden - right in their little shell! Or, if the weather is hot and sunny with no cold weather risk, you can plant them immediately into your garden as my children did! No waiting around...

Have fun!

Wednesday, June 29, 2011

Recycled Nature Buckets

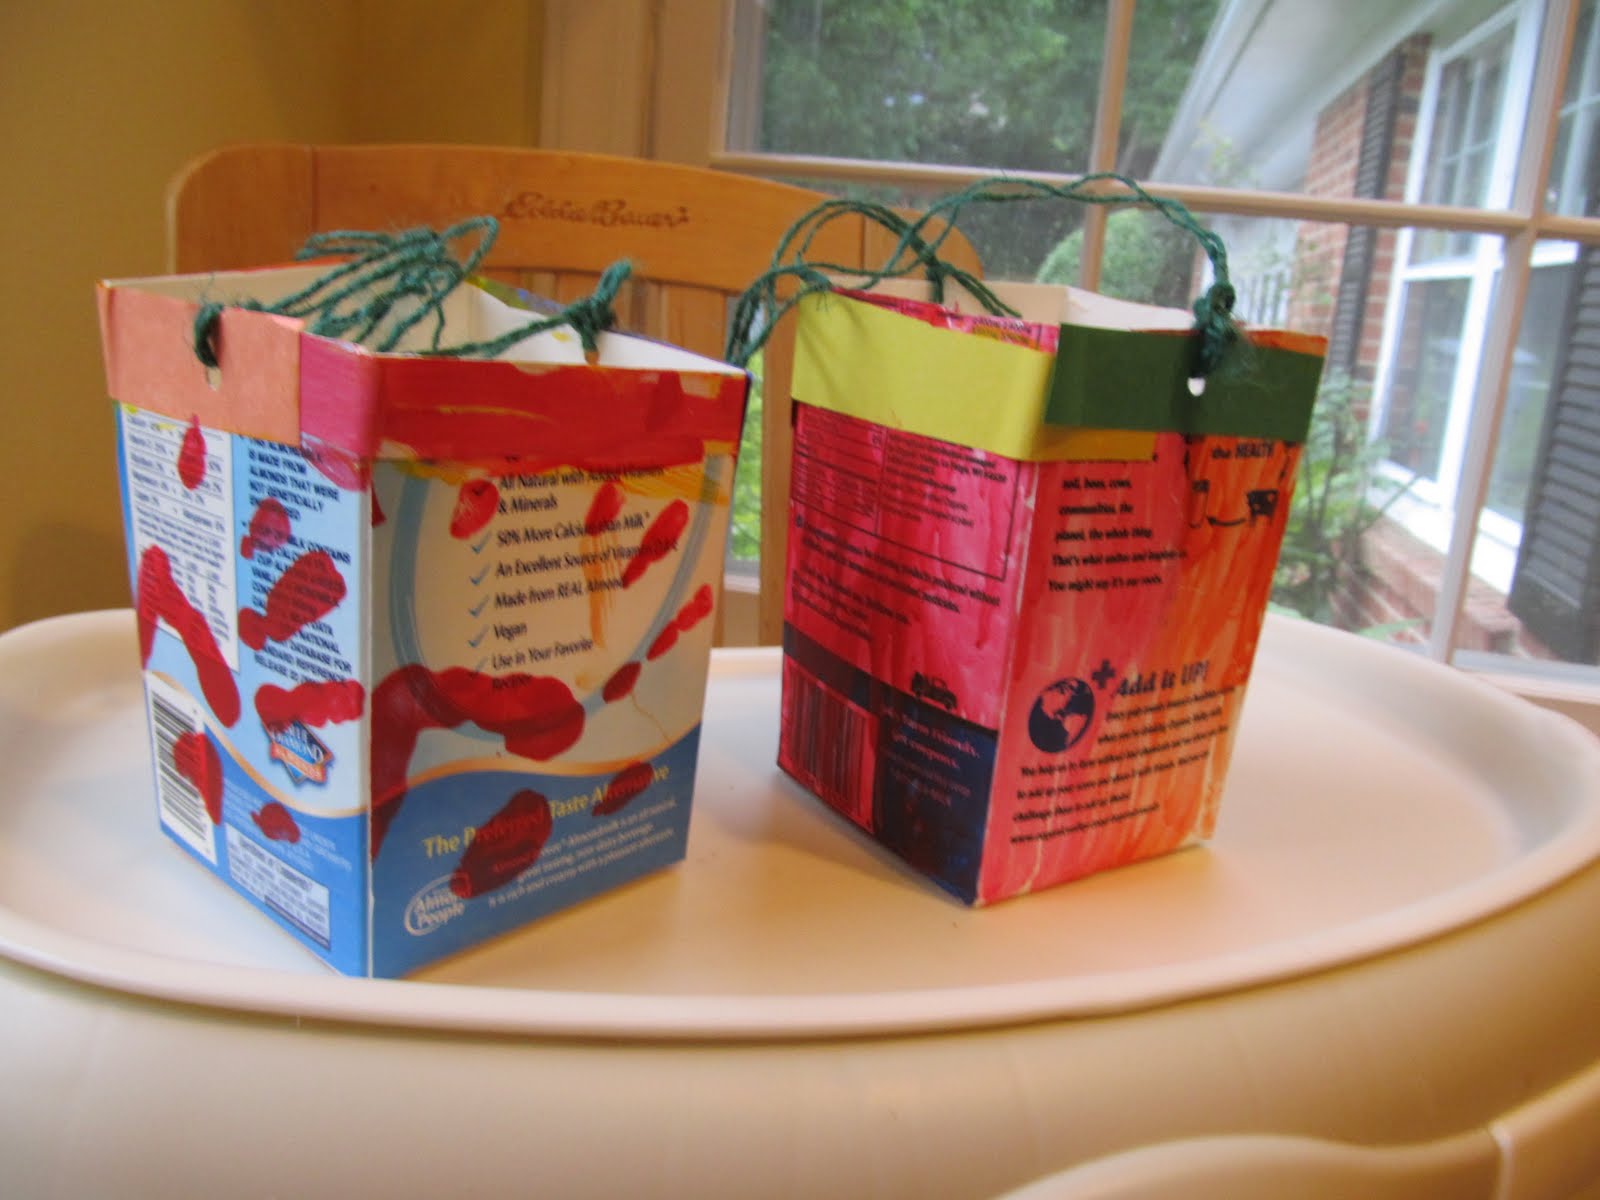
2 of the final products
We are always going on nature walks - sometimes down the street or around the park and sometimes just in our own backyard. Having the children make their own nature buckets alleviates the problem of "Mom, mom, can you carry this bug home for me?"

Gather together... 

Empty milk cartons, rinsed and dried
Paint, glue, paper, stickers, paintbrushes
Hole punch
Twine or string

How-to... 


Decorating his nature bucket
For this project, I set aside three empty milk cartons - in this house, that took just a couple of days! Rinse out the cartons and let them dry. Open the tops of the cartons like you would open a small milk at school and, using a scissors, make a cut down the side to give you access to cut evenly around the top of your milk carton to make a nice-sized bucket. You can make these buckets small for little people, or taller for the big kids.

Since every project in our house seems to involve paint, I set out some different colors of paint and strips of paper so that they could decorate their nature buckets. Stickers or markers would also work well.

Someone always has to paint herself...
Colored glue trick: I like to use regular Elmer's school glue but I tint it with one of the paint colors. For this project, we tinted the white glue with yellow paint. All you have to do is squeeze some white glue into one of your egg carton spaces and then add any color. Gently mix it together with your paintbrush and you have colored glue! We try to keep a designated paint brush the GLUE BRUSH and clean it with soapy water after our project is finished. I have rarely seen anything good come out of having small children squirt glue out of an unwieldy bottle. This approach seems to make our projects go much more smoothly when glue is involved!

To finish... 

A hole punch and twine
Once your bucket is decorated and has dried, use a hole punch to punch a hole in two sides. Cut a piece of twine or string double the length of the handle that you would like to have and loop it through the holes. Double knot the double length string or twine on the inside of the nature bucket and presto! your project is complete!

Happy nature hunting! These buckets can be used to collect bugs or leaves or mushrooms or just about anything. Enjoy! 

Tuesday, June 21, 2011

Leaf Rubbings

Making a leaf print, or leaf rubbing, is an easy and fun activity for kids of all ages that can be done just about any time of year. All you need are some interesting leaves, some pieces of paper, and a few crayons with no wrappers. We always seem to have an assortment of broken crayons - coloring can be such an intense activity over here - that we use those broken crayons for the leaf rubbings.

Place your leaf under a piece of paper - any kind of paper will work, we used white paper and different colored crayons. Take your paperless crayon and rub back and forth over the leaf using the side of the crayon. Your kids will be excited to watch the details of the leaf emerge! My kids like to experiment with the leaf upside down and right side up - you will get a good image either way but you might get a little bit more detail with the leaf upside down.

My daughter wanted to cut out her leaves and glue them into her nature journal. My son preferred to make a bunch of leaf rubbings on one page to create a sort of leaf collage. The possibilities are endless. For older children, you can find a nature guide that would help them identify the types of leaves they find so they can label their rubbings.

For more information on identifying leaves, click on the links below: 

About.com Identify and Name 100 Common Trees
Ohio Public Library Information on Leaf Identification

Monday, June 20, 2011

Nature Journals

My kitchen compadre, the cicada
We looove nature over here. At the moment, there is a GIANT cicada residing right beside the cooktop. Sometimes, when the house gets a little bit too quiet, we chat a little. If you live in the south, you know that we grow bugs big down here. I was slightly concerned when I heard that news upon my arrival to Charlotte, my kids, however, heard that and were elated. When I see pest exterminator trucks driving around my neighborhood, I am often tempted to offer the services of my children... you wouldn't even need to pay them - just promise they can keep whatever they catch.

Needless to say, when the campers think that there is absolutely nothing to do, I can always resort to a "bug hunt." And, after a bug hunt, what better way to chill out and have some quiet time than to "write" about the bug hunt in your nature journal. When I am not head counselor at Camp Brighton, I am a teacher of other people's children so I have to throw in my two cents about having children write every day. Every day. Spelling and grammar are much less important than developing the habit of sitting down and putting colored pencil to paper. It's never too early to start developing these good habits and a nature journal alleviates the "what do I write about?" anxiety that many children face.

In our nature journals, most of the page is often taken up by a large illustration. Sometimes the description is one word (or no words at all for my 3 year old). For my older children, now six, I will usually give them no direction - I let them decide what and how much they would like to write. If they are stuck, I might suggest a topic or a specific amount of sentences that I would like to see, or I might tell them I want to see six description words. I might also give them a prompt - maybe the first part of a sentence that they have to finish.

Fun Activity: Making the Nature Journals

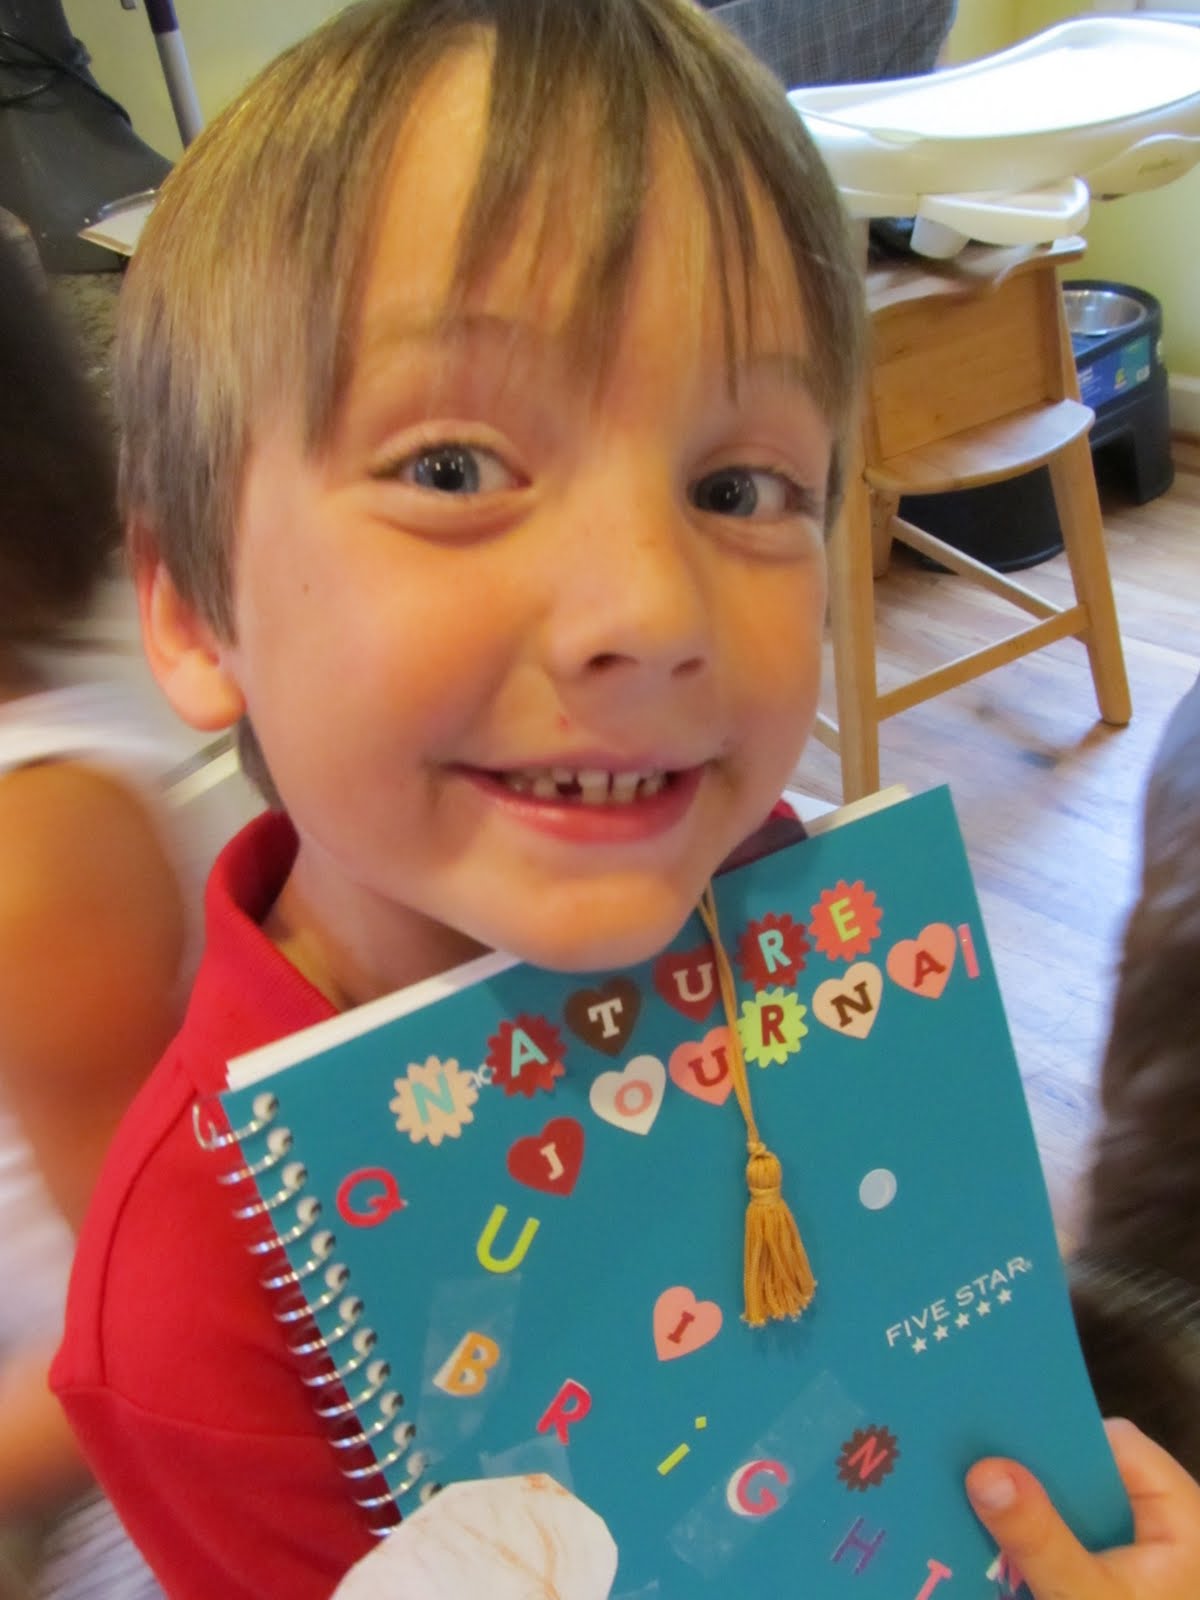
Making the nature journals is a project in and of itself. Let the child choose a notebook or use one you can find around the house - it can have blank pages or lines. Mead makes an excellent composition notebook for little writers (grades K - 2) that has half a page of lines and half the page blank for illustrations. You can order them online or find some at Target or other office supply stores. Get some nature stickers and letter stickers and decorate the cover. My older children chose small notebooks that had lines and a pocket inside to store "keepsakes" - ticket stubs, photos, etc. We found inexpensive notebooks at Target for about $2 and stickers for $.99. These journals usually accompany us on all car trips - even if we are just going down the street to the school playground or to Freedom Park. You never know what you might find!

For more information on the importance of the development of a relationship between children and nature, read this article from 2004 written by Randy White. (Click here for the pdf)


I also recommend that you read Last Child in the Woods by Richard Louv. 

Check out this website for prompts and other ideas for nature journals: Keep a Nature Journal

Thursday, June 16, 2011

Mushroom Spore Prints

It's been a little rainy around here lately in the evenings. Absolutely not complaining - the more little rain storms we get, the less watering of the plants and veggies do I have to do. Along with the benefit of watering my gardens, the rain also provides some nice moisture perfect for the growth of mushrooms. Today we went on a mushroom hunt with the plan to take some mushroom spore prints. I remember doing this as a child - my parents never throw anything away so if you visit my childhood home, you will probably see at least one or two really great specimens lining the plate rail in my parents' living room. I am not sure that I can promise my children the same, but they seemed to love this project just as much as I did.

What the heck is a mushroom spore print?

A mushroom spore print is the imprint of the spores from the underside of a mushroom cap on a piece of paper. Different mushrooms leave different spore prints so, if you are into identifying mushrooms (confession: me, me!), a mushroom spore print will aid in proper identification.

How To:

For this project, all you need are some newly grown mushrooms - if they are too old, they will have already dropped their spores outside - and some colored construction paper.

Different mushrooms have different colored spores. Some spores are white or gray, others could be black or red. Let the kids choose different colors of paper to make this even more experimental.

All you need to do for this experiment is to carefully remove the stem from the mushroom and place the mushroom on a piece of paper. If the mushrooms are bigger, the kids can probably remove the stems themselves. Because these mushrooms were so tiny, I snipped off the stems with my kitchen shears. Cover the mushroom with a water glass so little fingers don't try to check the progress! Let the mushroom sit for a few hours - we gathered our mushrooms before swim team practice and let them sit for about 5 or 6 hours before we came back to check on them.

When the time is up, lift your mushroom and look for the spore imprint. The kids were thrilled that their little mushrooms left such vivid spore prints! Ours were a lovely rust-colored orange! We can't wait to see what our next mushroom discovery looks like...

For more information about mushrooms: 

The American Mushroom Institute put out a mushroom workbook for kids

The Cap Crew - a website about mushrooms from Canada

Information about identifying different types of mushrooms